
Dalmatian and Diamonds
This is an animated tag made with PSP 7 or higher {Screenshots for PSP 8-10 in brackets if different from PSP7}, Animation Shop 3 and no outside filters.
An understanding of PSP 7 is helpful, This is not a difficult tut, just a lot of steps and frames to animate.
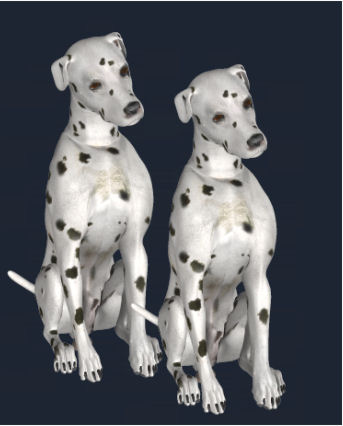
If you want to use my Poser Dalmatian, click here for .pgn file, click here for .tub file, click here for .psp 7 or higher file, otherwise choose a tube of your choice.
I used Antsypants font, you click here to download.
Open a new image, 600 X 600. We will resize when we import to Animation Shop.
Flood fill with black or any color you choose. The best color will be one that is minimal in your tube.
Copy and paste the tube into your image as a new layer, close the original tube.Go to layer, duplicate.Highlight the bottom tube, Offset copy of tube layer so it is just to the left and above the original.
Hold your Shift key down and hit your “D” key 10 times. This will duplicate the image. Save each new image as a .psp file somewhere you can recall them. I created a new folder on my desktop and named each in order, dal-01, dal-02, etc. Do not close the images right now, just minimize them to the bottom of your workspace.
You should have 11 images, of 3 layers each.
Restore dal-01
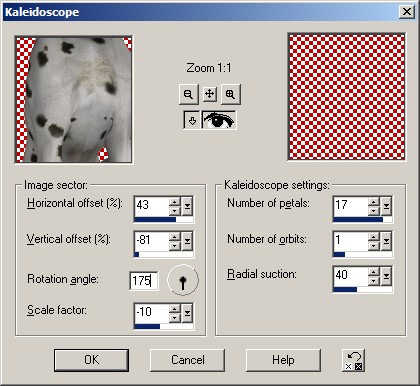
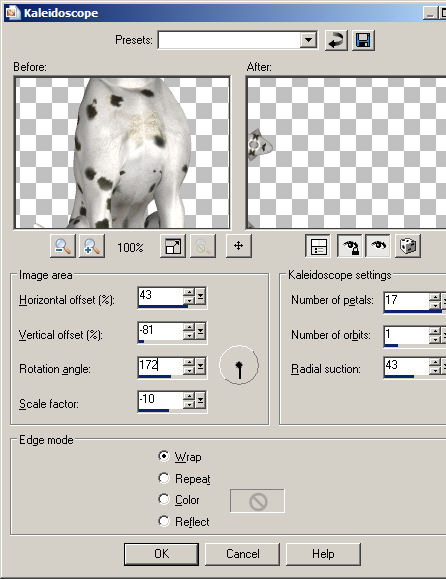
Go to Effects, Refection Effects, Kaleidoscope. Use these settings for PSP 7 only. {PSP 8-10 on next page.}
{Kaleidoscope settings for PSP 8-10}
Save image and close.
Open dal-02 (or whatever you named it)
Go to same effect, change ONLY Rotation angle, to 173 {170}.
Save and close.
Continue through all your images, reducing the count on rotation angle with these numbers:
dal-03..171 {166} save & close
dal-04..169 {163} save & close
dal-05..160 {161} save & close
dal-06..158 {161} save & close
dal-07..155 {159} save & close
dal-08..153 {157} save & close
dal-09..151 {155} save & close
dal-10..149 {154} save & close
dal-11..152 {152} save
On this last layer, go to your text button, use these settings:
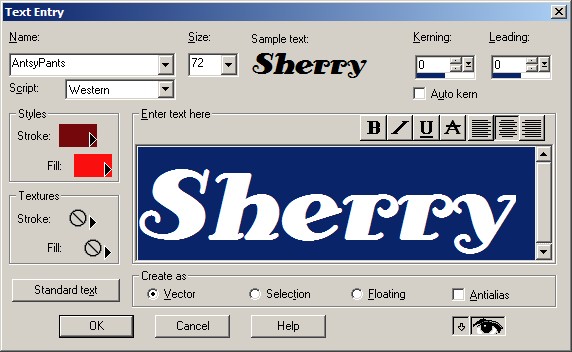
Choose the colors you want…I used stroke color #74080A and fill color #FA0E0E.
Go to Layer, convert to Raster layer.
Go to Edit, Copy, Edit, Paste, Paste as a new image.
Minimize the name for now.
Close dal-11. DO NOT SAVE!!!
Open Animation Shop
After Animation Shop opens,
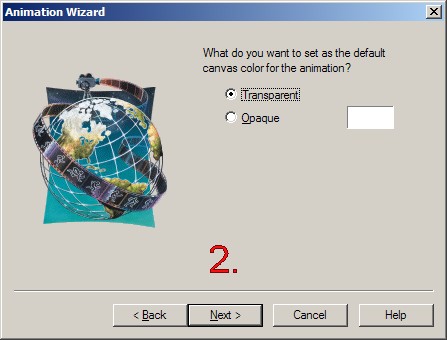
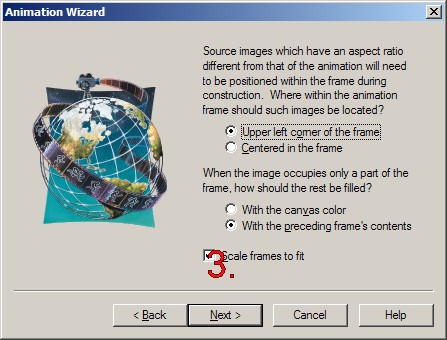
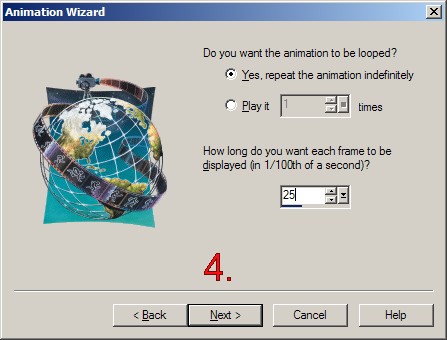
Go to File, Animation Wizard. Use these settings in order….

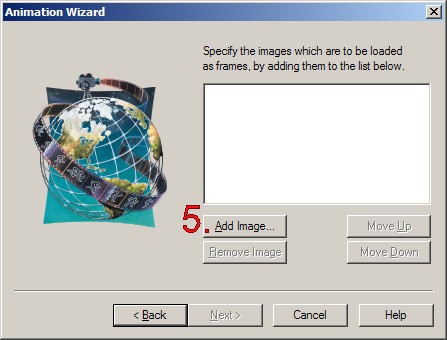
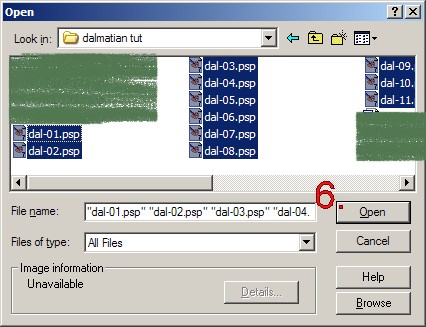
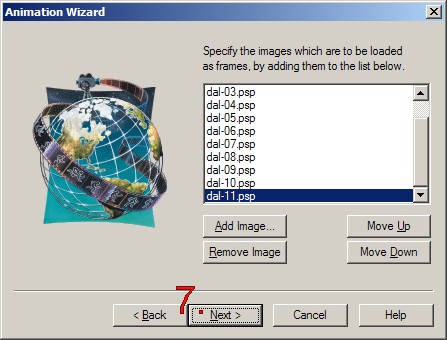
Make sure all the images are in order.
Use the Move up or Move Down to reorder them from dal-01 to dal-11.
Click finish.
All the frames should be in place with the smallest diamonds to the largest in order.
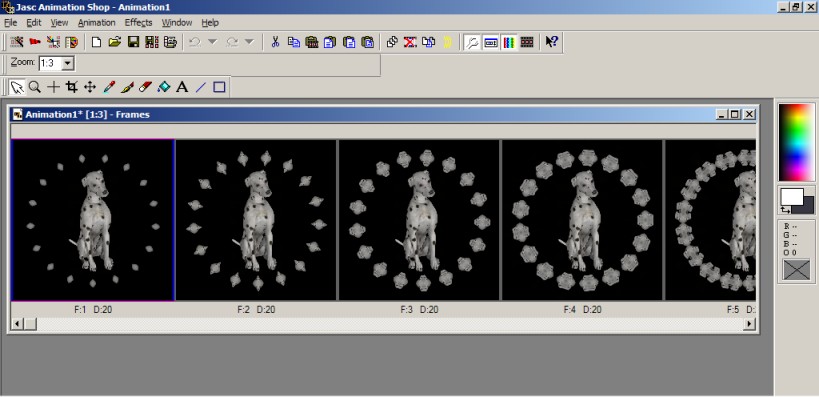
Go to Edit, select all.
Go to Edit, Copy, then, click once on frame 11.
Go to Edit, Paste, Paste after current frame.
Frame 12-22 should be highlighted. If they are not, hold the control button down and click on each to highlight them.
Go to Animation, Reverse frames.
This will reorder frames 12-22 in reverse order.
Now you should have the diamonds animated.
Remember the name you left sitting in PSP?
Go to your PSP, right click on the name, copy, come back to Animation Shop and right click, paste as a new animation. DO NOT PUT IT INTO THE ANIMATION YET. (It will not be the correct size if you do.)
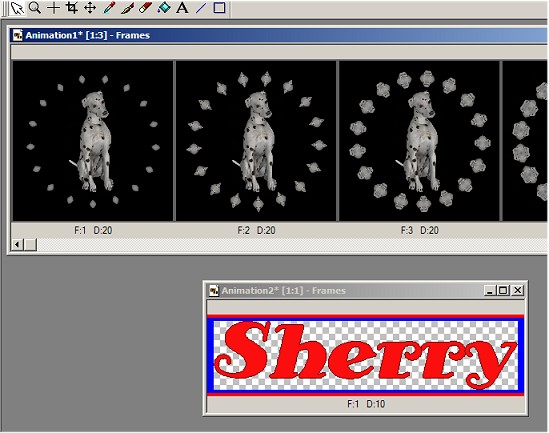
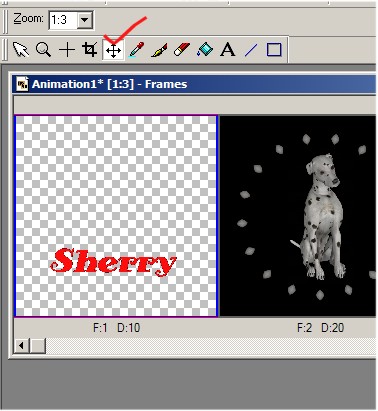
Now, right click the name again, copy, go to frame one, click once to highlight, right click on frame one, paste, before current frame.
Use you mover tool to center the name where you want it.
Go to Edit, Select all, click on the Propagate Paste button.
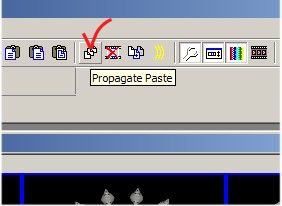
Make sure your pointer button is on, hold your left mouse button down, move your name over the first frame and center without releasing the mouse button. Hold your shift key down, and release the mouse button. This should make the first frame with your name in it disappear, and place your name on all the frames with the diamonds in them.
Go to Edit, Select all, Animation, Resize animation, and change the size to 400 X 400.
Save as a gif and you’re done!